
You measure the thing you want to keep in the box, draw a box exactly that size, cut it – and the thing doesn’t fit. It happens to almost everyone once. The reason is simple: the walls have a thickness, and it has to go somewhere.
In this article I’ll explain, in plain words, the difference between the inside and the outside size of a laser cut box, the easy math behind it, and how to get a box that fits the first time.
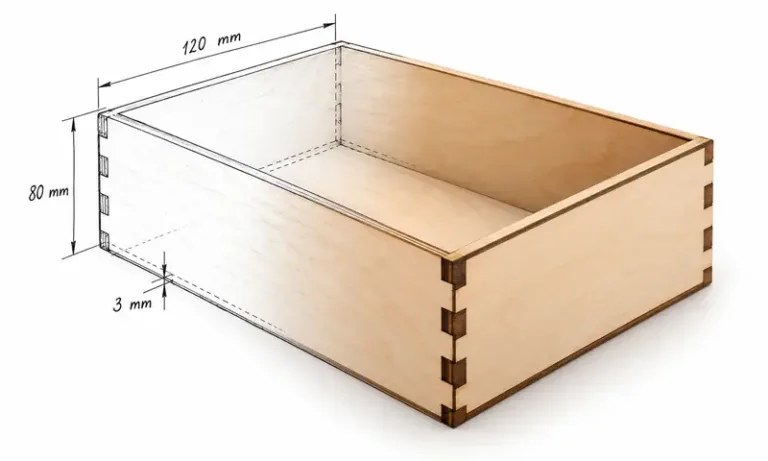
Short answer: the inside size is the space for your things; the outside size is the box with its walls. With 3 mm plywood, the outside is 6 mm wider and 6 mm deeper than the inside, and an open box is 3 mm taller. Use the inside size when something must fit in the box, and the outside size when the box must fit somewhere – like a shelf or a drawer.
Inside vs outside: what’s the difference?
Imagine a shoe box. The shoes care about the space inside. The shelf cares about the size of the box from the outside. The difference between the two is the cardboard – or, in our case, the plywood walls.
Every wall takes up its thickness. There are two walls across the width and two across the depth, so the box grows by two thicknesses in each direction.
The simple math
Here is all the math you need for an open box. Let’s say you want 100 × 60 mm of space inside and 40 mm of height, cut from 3 mm plywood:
| Size | How to get the outside | Example, 3 mm plywood |
|---|---|---|
| Width | inside + 2 × thickness | 100 → 106 mm |
| Depth | inside + 2 × thickness | 60 → 66 mm |
| Height (open box) | inside + 1 × thickness (the bottom) | 40 → 43 mm |
Don’t want to do the math? My free Box Generator does it for you: choose “Inside space”, type the size of what goes in, and it builds the walls around it – lid, dividers and all. No sign-up, no email.
Which size should you use?
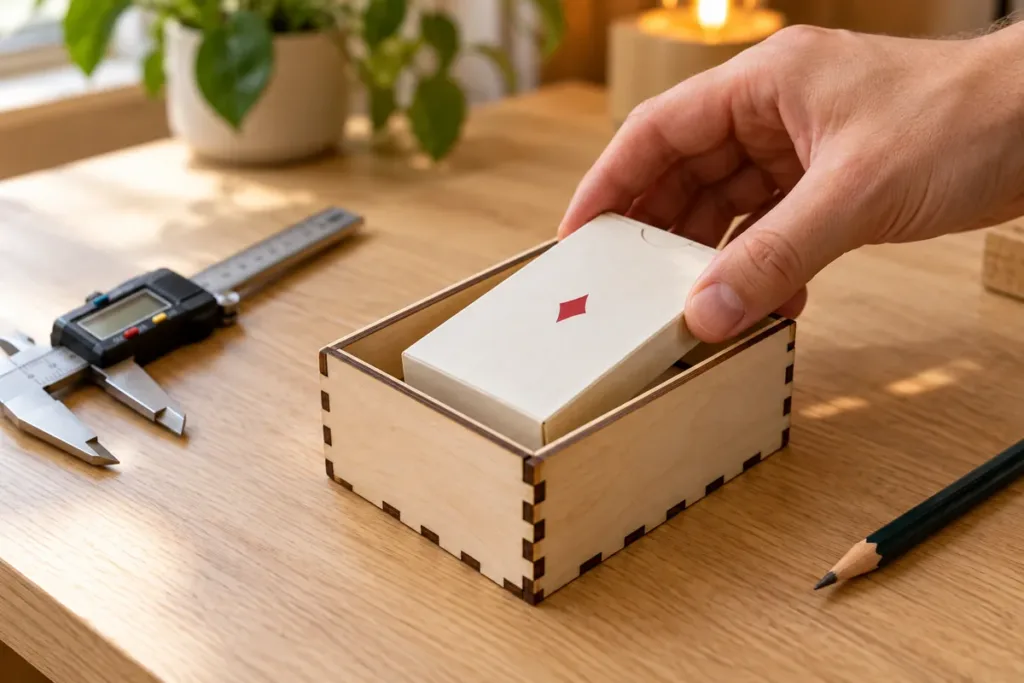
- Use the inside size when something has to go in: a deck of cards, tea bags, jewelry, tools, a gift. Measure the item, add a little room, and build the box around it.
- Use the outside size when the box has to go somewhere: a shelf cube, a drawer, a gap on your desk. Measure the space, take off a few millimeters so the box slides in, and build the box to that.
If you are making organizers for a drawer or a shelf, you will often need both: the outside size for the drawer, and inside sizes for each little compartment.
Leave a little room
A box that is exactly the size of the item is too tight in real life. Plywood is never perfectly even, paint and varnish add thickness, and you want to get the item out again. About 1 mm on each side is a good start – more for soft or bulky things.
Two more things decide whether your box fits:
- The real thickness of your plywood. “3 mm” plywood is rarely exactly 3 mm. Measure it with calipers and type the real number.
- Kerf and fit. The laser burns away a thin strip as it cuts, so parts come out a little smaller. Here is what kerf is, in plain words, and my free Kerf & Fit Test measures it on your machine.
Lids, raised bottoms and dividers
These change the space inside, so it’s good to know what each one takes:
- A lift-off lid sits on top and adds one thickness to the height. The guide plate under it, which keeps the lid in place, takes one more thickness inside the box.
- A raised bottom leaves a hidden space underneath, but the height above it gets smaller.
- Dividers are as thick as your plywood. Two dividers across a 100 mm box take 6 mm, so each of the three compartments is (100 − 6) ÷ 3 ≈ 31.3 mm wide.
The good news: you don’t have to remember any of this. When you choose “Inside space” in the Box Generator, it adds the bottom, the lid and the guide for you, and you can click any compartment to type its exact size.
Step by step: a box that fits the first time
- Measure what goes in the box – width, depth and height.
- Add a little room: about 1 mm on each side.
- Measure your plywood with calipers.
- Open the Box Generator, pick the box style, switch to “Inside space” and type your sizes and the thickness.
- Check the outside size shown under the 3D view – that’s how much room the box needs on the shelf.
- If you know your kerf and fit from the Kerf & Fit Test, they are already filled in. If not, the defaults work for most lasers.
- Download the SVG or DXF and cut one corner first – a bottom and one side – to check the fit before you cut the whole box.
Common mistakes
- Using the item’s size as the outside size. The walls eat 6 mm, and the item doesn’t fit.
- Trusting the label on the plywood. Measure it.
- Forgetting the lid. A lid adds height on top and a guide takes space inside.
- Leaving no room at all. A box that fits “exactly” is a box you can’t open.
- Forgetting the dividers. Each one takes a thickness from the space.
Looking for something ready-made? Here are my laser cut box designs – beer carriers, gift boxes, planters and more.
FAQ
Both – you choose. “Outside size” builds the box to fit a shelf or a drawer. “Inside space” builds it around the thing you want to put in, and the generator adds the walls, the bottom and the lid for you.
Two wall thicknesses in width and depth – 6 mm with 3 mm plywood. In height, an open box is one thickness taller (the bottom). Lids and raised bottoms add more.
Yes. Measure the sheet with calipers and type the real number. The size of the box and the fit of the joints both depend on it.
About 1 mm on each side is a good start, so the item slides in and out easily. For soft things like fabric, or anything you want to grab with your fingers, leave more.
No. The fingers sit inside the outside size – they only decide how the walls lock together. A box set to 106 mm outside measures 106 mm, fingers and all.
Measure once, cut once
Inside or outside – once you know which one you need, box sizes stop being a guessing game. Measure the item or the space, add a little room, and let the generator build the walls around it.
Happy cutting!
– Pavel