
If your laser cuts through on one side of the bed and struggles on the other, don’t blame the plywood first. Very often the problem is three small mirrors that have moved a fraction of a millimeter.
Here is what I learned on my own two CO₂ lasers. The first mirror almost never needs touching – only when I change the tube. The second and third mirrors ride on moving parts, and vibration slowly pushes them off. In this guide I’ll explain in plain words how alignment works, what you need, and how to do it step by step without spending a whole weekend on it.
Short answer: a CO₂ laser bounces its beam off three mirrors before it reaches the lens. To align them, put masking tape over the next mirror, fire one short low-power pulse with the gantry or head close, then far, and turn the screws on the mirror before it until both marks land in the same place. Always go in order: mirror 1, then 2, then 3 – and wear safety glasses rated for CO₂ lasers.
Do you need to align your mirrors?
Only if you have a CO₂ laser with an open beam path – the usual “big box” lasers with a tube at the back, like K40s and most 50–150 W machines. Diode lasers, lasers with sealed optics and galvo lasers don’t have mirrors you align this way.
Signs that your mirrors are off:
- the laser cuts through on one side or corner of the bed but not on the other;
- cuts get weaker the farther the head goes from the tube;
- the cut edge is slanted instead of straight;
- you moved the machine, changed the tube, or the head hit something.
Before you grab the hex key, clean the mirrors and the lens and check the focus with my free Laser Focus Test. A dirty lens or wrong focus can look exactly like bad alignment.
How the beam travels
Think of it as a game of billiards with light. The beam leaves the tube, bounces off three mirrors and then goes down through the lens onto your material:
Mirror 2 rides on the gantry, and mirror 3 rides on the head. That’s why the beam has to be perfectly parallel to their paths: if it is even a little tilted, it hits a different spot when the gantry is near than when it is far away.
The one rule that makes alignment easy
The screws on a mirror don’t move the mark on that mirror – they move the mark on the next one. You turn the screws on mirror 1 and look at the marks on mirror 2. You turn the screws on mirror 2 and look at the marks on mirror 3. And the farther away the target, the more a small turn moves the mark.
Your goal is not to hit the exact center with the screws. Your goal is to make the near mark and the far mark land in the same place. If they meet but are a bit off center, you fix that by sliding the whole mirror holder – not with the screws.
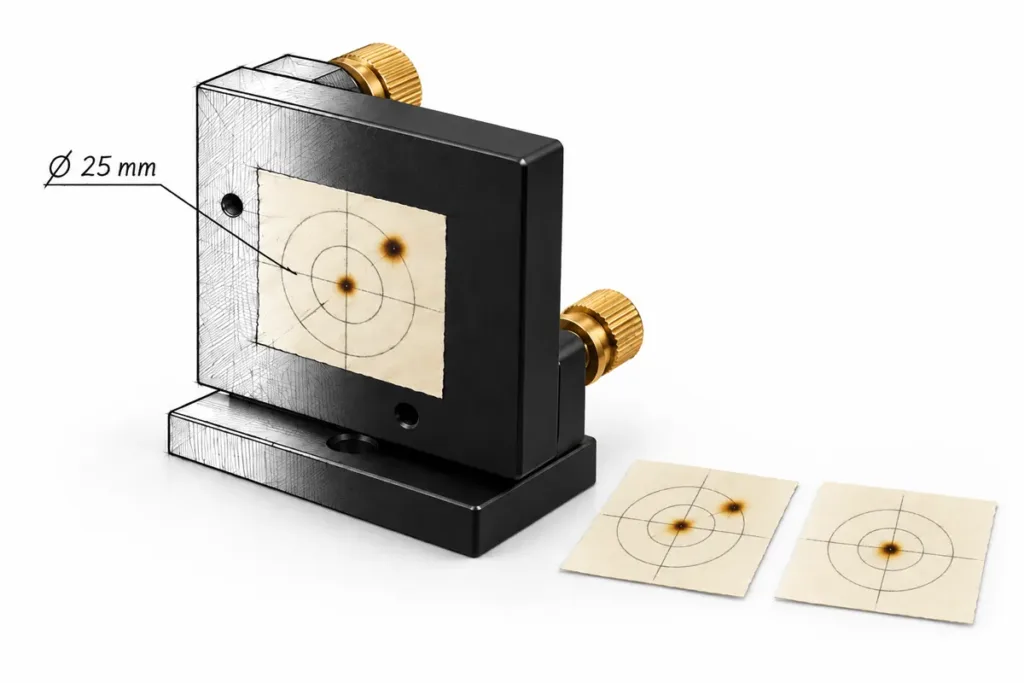
| Mirror | Where it sits | You check it by… | How often |
|---|---|---|---|
| Mirror 1 | On the frame, next to the tube | Two marks on mirror 2: gantry near and far | After a new tube or a knock |
| Mirror 2 | On the gantry (it moves) | Two marks on mirror 3: head near and far | Now and then – vibration moves it |
| Mirror 3 | On the laser head (it moves) | Marks at the head entry in the center and four corners | Now and then, and after a crash |
Can never remember which screw does what? My free Mirror Alignment helper works on your phone right next to the machine: fire a pulse, tap where the mark landed, and it tells you which screw to turn, which way and how far. No sign-up, no email.
Stay safe first
A CO₂ laser beam is invisible and can burn skin and eyes in an instant. Please don’t skip this part:
- Wear safety glasses rated for CO₂ lasers (10,600 nm). Regular glasses or diode laser glasses are not enough.
- Keep the lid closed when you fire, and keep your hands out of the beam path.
- Switch the laser off, or turn firing off, before you reach in to turn a screw.
- Use single short pulses at low power. Tape can catch fire if you hold the button down.
- Follow your machine manual – you know your machine best.
What you need
- masking tape (or printed paper targets – the helper can make them for you);
- the right hex key or small wrench for your mirror screws;
- safety glasses rated for CO₂ lasers;
- a pen and a few minutes of patience;
- a cup of coffee. That’s my personal choice – some people prefer something stronger (just save it for after the laser is switched off).
Step by step: how to align CO₂ laser mirrors
- Clean the optics. Wipe the mirrors and the lens with lens cleaner or isopropyl alcohol and a soft swab.
- Check mirror 1. Put tape over mirror 2. Move the gantry close to the back and fire one short pulse. Then move it to the front and fire again. If both marks land in the same place, mirror 1 is fine – leave it alone.
- If they don’t meet, adjust mirror 1. Turn one screw on mirror 1 about 1/8 of a turn and fire near and far again. See which way the far mark moved. Keep going in small steps until the near and far marks overlap.
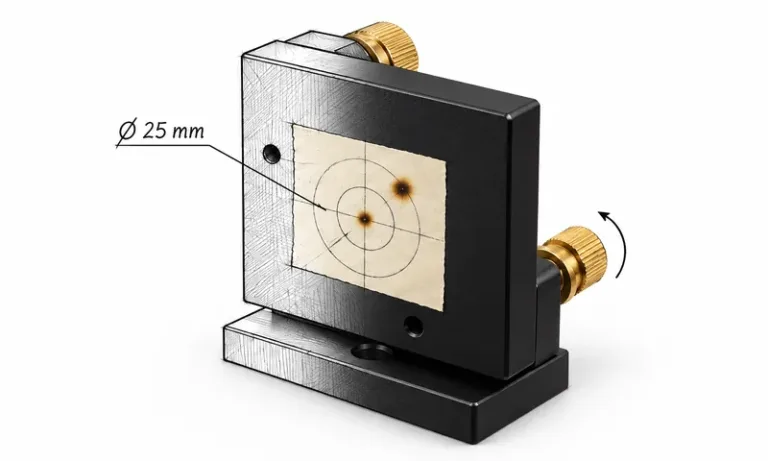
- Align mirror 2. Put tape over the head entry. Fire with the head close to mirror 2, then far away on the other side. Turn the screws on mirror 2 in small steps until both marks meet.
- Check the head in all corners. Fire once with the head in the center and once in each corner of the bed. If all marks land in the same place, mirrors 1 and 2 are right across the whole bed. The last bounce, from mirror 3 straight down through the lens, is set as your machine manual describes.
- Tighten and check again. Gently tighten the small lock nuts on the screws, then fire one more near and far pair. Tightening can shift the mirror a little – it’s only done when the marks still meet.
Not sure which screw to turn? This is exactly where the free Mirror Alignment helper saves time. You tell it where the screws sit on your mirror holder, then tap where each mark landed – and it keeps track of what every screw does, so you don’t have to.
Routine check or full alignment?
You don’t have to start from zero every time. On my machines, a routine check is enough most of the time: one near and far pair on mirror 2 to make sure mirror 1 is still right, then mirrors 2 and 3. A full alignment from mirror 1 is only needed after a new tube, a move, or a hard knock. The helper asks which one you need on the first screen.
Common mistakes
- Turning too much. An eighth of a turn is plenty. Big turns make the mark jump off the mirror.
- Trying to center the mark with the screws. The screws make the marks meet; centering is done by sliding the holder.
- Skipping the order. Changing mirror 1 changes everything after it. Always go 1 → 2 → 3.
- Forgetting to check after tightening. The lock nuts can move the mirror a little.
- Aligning when the real problem is the lens. Clean the optics and check focus first.
Once your mirrors are aligned, the next steps are the focus test, the right speed and power from a material test, and then the fit of your joints – here is what kerf is and how to measure it.
FAQ
There is no fixed schedule. Check mirrors 2 and 3 when your cuts get weaker on one side of the bed, after you move the machine, or after the head hits something. Mirror 1 usually needs work only after a new tube.
No. Diode lasers have the light source right in the head, so there are no mirrors to align. Lasers with sealed optics, like Glowforge, and galvo lasers are also set up differently.
The two or three screws on the back of the mirror holder, often with springs and small lock nuts. They tilt the mirror. The bolts that hold the whole holder to the machine are different – you only loosen them to slide the holder when the beam is far off center.
Most often the mirrors are slightly off: the beam hits the head in a different place near and far, so less power gets through the lens. A dirty lens or mirror and wrong focus can look the same, so clean the optics and check focus too.
When the near and far marks overlap – within about half a millimeter is good. At the head, the mark should be close to the center of the hole.
Align your mirrors in one evening, not one weekend
Mirror alignment looks scary only until you know the one rule: screws on one mirror move the mark on the next, and near and far must meet. Go in order, take small steps, and let the helper remember the screws for you.
Happy cutting!
– Pavel